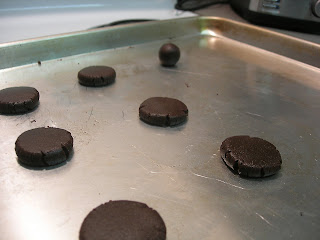
I preheated the oven to 375 degrees like the recipe said, but not knowing exactly how our oven worked, I decided to check the cookies at 5 minutes instead of cooking them for the recommended 9. I began to imagine how excited Ben would be when he came home to freshly baked Oreos, but was jarred back to reality when the smoke detector started beeping only 3 minutes after I had put the cookies into the oven! I pulled them out of the oven as quickly as I could as the smoke billowed out of it (melting my hot-pad in the process!) and started fanning the smoke away from the screeching device on the ceiling.
After I cleared out most of the smoke and got the alarm to stop beeping, I decided to do something rather drastic and turn the oven temperature down a whole 100 degrees! It seemed like a bit much, but after breaking one of the previous "cookies" in half and finding nothing but charcoal, I decided baking them at 275 for 7 minutes would be fine.
Boy was I wrong!
Imagine my frustration when only five minutes later the smoke detector started beeping again. I ran through the same drill, pulling the former cookies out of the oven and then running over to fan the smoke away from the alarm.
By this point I was hot and sweaty and disappointed about the two dozen cookies that now sat as a pile of charcoal nuggets in the garbage. I decided to try one more time. I made a single cookie and baked it for 3 minutes at 175 degrees and.... it worked!! I was so excited.
A word of warning: this cookie is rather sweet, calling for a whopping 1 1/2 cups of sugar! This would be great just by itself as a cookie, or maybe sandwiching some black cherry ice cream (or whatever flavor you like), but combined with the incredibly sweet filling, a few of these are liable to put you into a diabetic coma! If you're looking for something closer to the original, and more palatable so that you can eat them by the handful, take out a full half cup of sugar.
Makes 25 to 30 sandwich cookies
For the chocolate wafers:
1 1/4 cups all-purpose flour
1/2 cup unsweetened Dutch process cocoa
1 teaspoon baking soda
1/4 teaspoon baking powder
1/4 teaspoon salt
1 to 1 1/2 cups sugar [see recipe note]
1/2 cup plus 2 tablespoons (1 1/4 sticks) room-temperature, unsalted butter
1 large egg
For the filling:
1/4 cup (1/2 stick) room-temperature, unsalted butter
1/4 cup vegetable shortening
2 cups sifted confectioners’ sugar
2 teaspoons vanilla extract
1. Set two racks in the middle of the oven. Preheat to 375°F. (This temperature has worked for numerous other people, so unless your oven is as weird as mine, you shouldn't have any problems.)
2. In a food processor, or bowl of an electric mixer, thoroughly mix the flour, cocoa, baking soda and powder, salt, and sugar. While pulsing, or on low speed, add the butter, and then the egg. Continue processing or mixing until dough comes together in a mass. *Note: it stays really crumbly for a while. Keep mixing! It will come together.*
3. Take rounded teaspoons of batter and place on a parchment paper-lined baking sheet approximately two inches apart. With moistened hands, slightly flatten the dough. Bake for 9 minutes, rotating once for even baking. Set baking sheets on a rack to cool.
4. To make the cream, place butter and shortening in a mixing bowl, and at low speed, gradually beat in the sugar and vanilla. Turn the mixer on high and beat for 2 to 3 minutes until filling is light and fluffy.
5. To assemble the cookies, in a pastry bag with a 1/2 inch, round tip, pipe teaspoon-size blobs of cream into the center of one cookie. Place another cookie, equal in size to the first, on top of the cream. Lightly press, to work the filling evenly to the outsides of the cookie. Continue this process until all the cookies have been sandwiched with cream. Dunk generously in a large glass of milk.
**You can try numerous variations on this recipe as well - it's only limited by your imagination. Two that I plan on trying are adding mint to make Mint Oreos, or filling the cookies with Peanut Butter Cream Cheese frosting.


No comments:
Post a Comment